Webform – Collect customer information on Chatbot Messenger
Webform is used to quickly collect customer information instead of User Input.
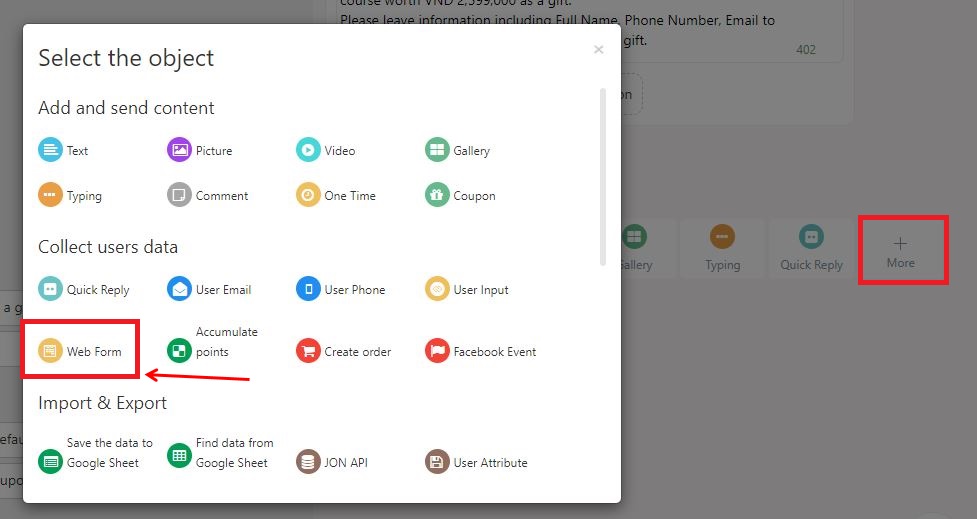
In the Message block, select More > Webform.
The personal information provided by the customer is stored in the variables. You can store in system variables or optional variables - name the variable yourself.
System variables for saving customer information include:
- {full_name}: Full name
- {email}: Email address
- {phone}: Phone number
- {birthday}: Date of birth
- {gender}: Gender
- {city}: City
- {address}: Address
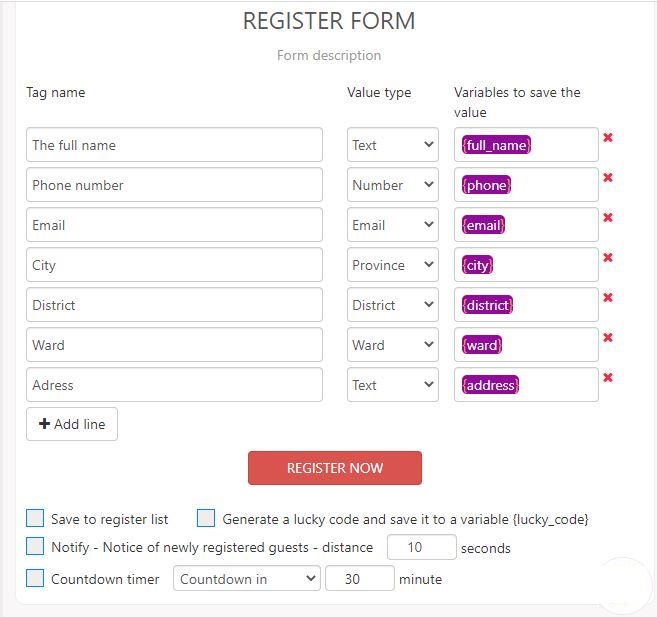
Here's a webform that updates customer profiles:
The options in Webform include:
- Register: See a list of subscribers in webform.
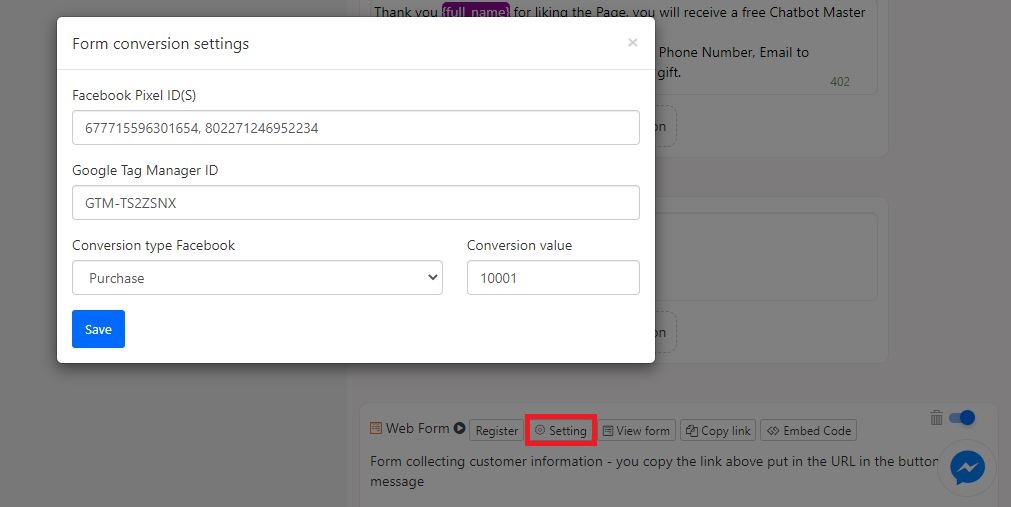
- Settings: Conversion settings, Pixel, GTM to measure efficiency. Each Pixel code is configured separately for each Form.
- See Form: Preview the form displayed on the Website.
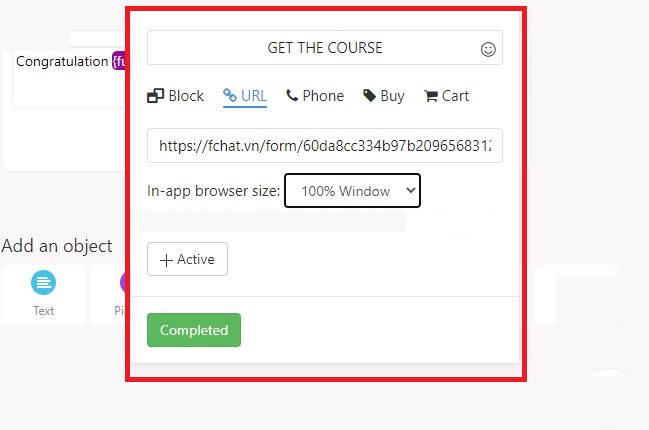
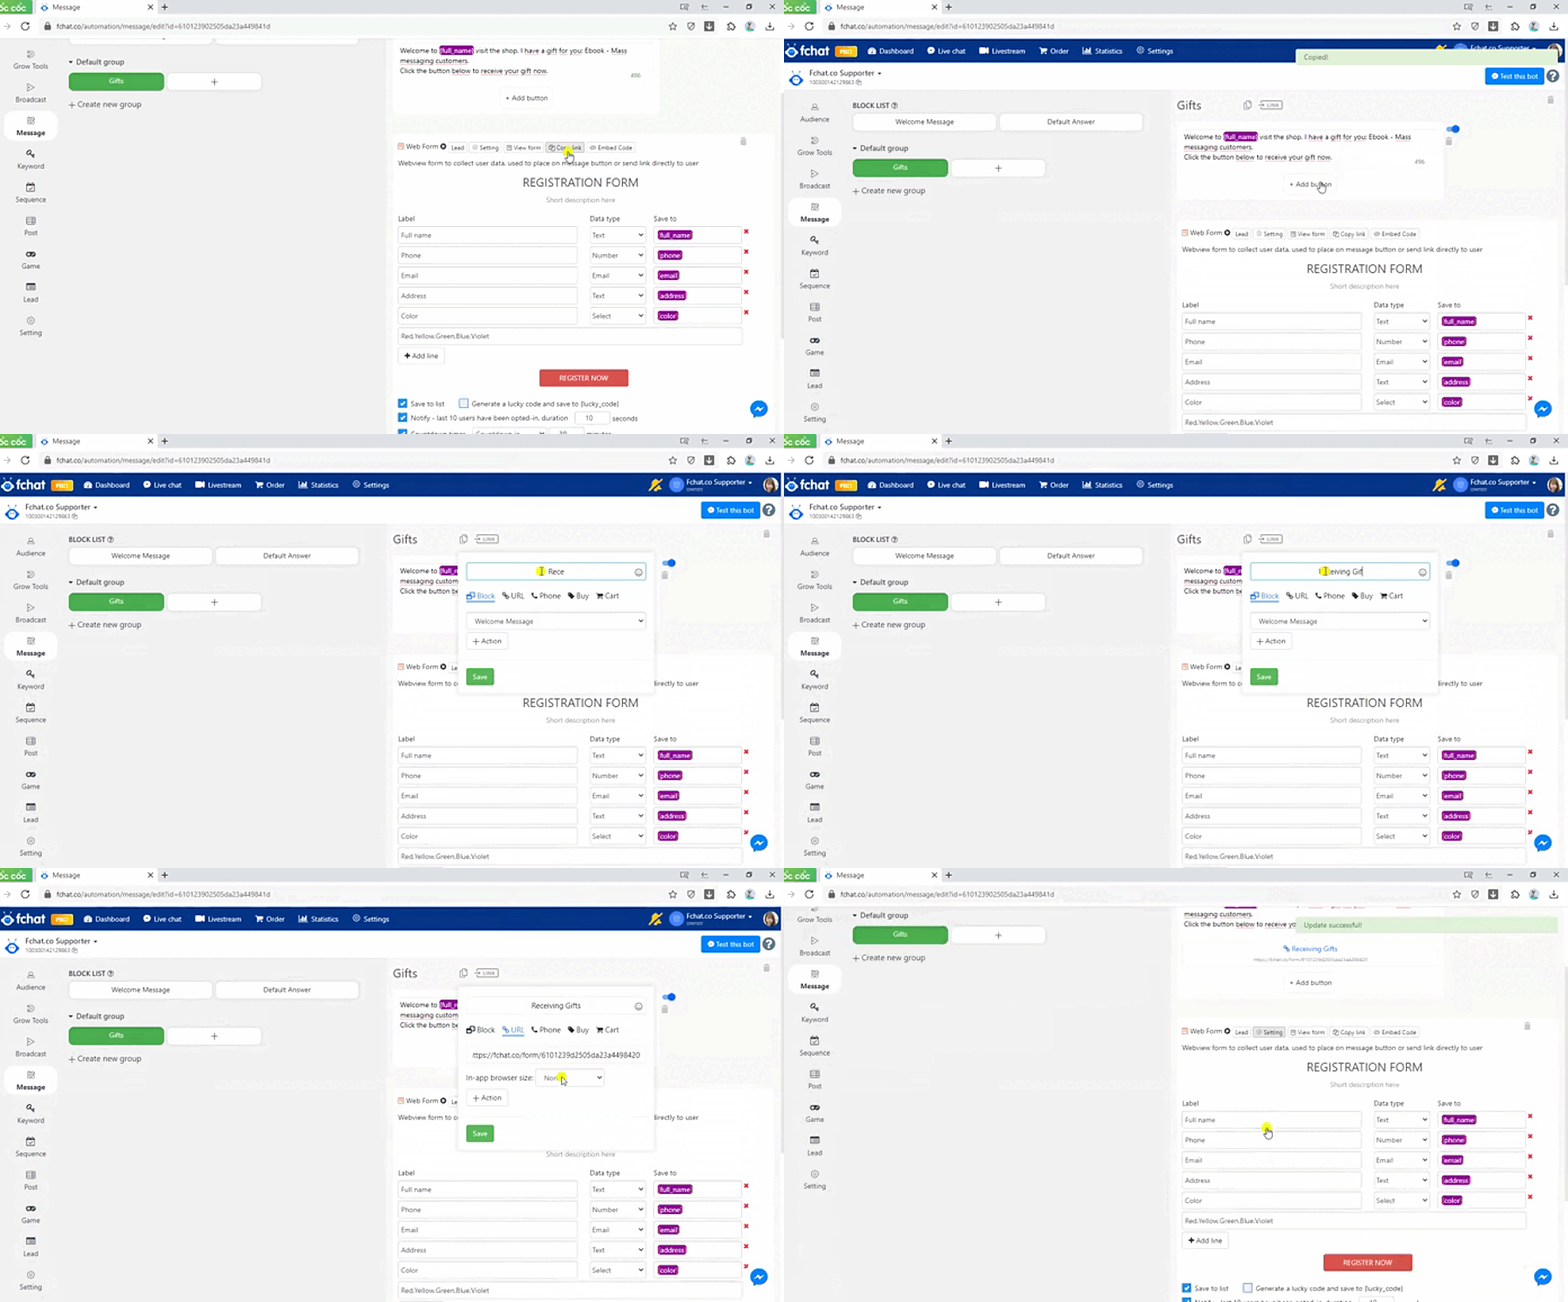
- Copy Link: Get the webform link. Each form will have a unique link. You copy the Webform link and place it in the Button item in the message block and select the In-app browser display mode: 100% window to enable webform in the script.
- Embed code: Get the webform embed code placed on the website/landing page to collect customer information registered in the chatbot.
+ The customer registers directly from the website/landing page: after the customer registers and confirms, the screen displays a successful registration message. The information the customer has entered will be included in the registration list and not create a Customer (which is stored in the Subscriptions section but not in the Customers section).
+ The customer goes from Chatbot > Website/landing page: after registering and confirming, they will return to the Messenger conversation to continue running the Chatbot script.
The options below Webform include:
- Save to registered list: Choose what information the customer provides to save to fchat or not. If you don't save it to Fchat, you can save it to Google Sheet.
> To save information to Google Sheet: https://fchat.co/help/google-sheet
- Create a lucky code, save it to {lucky_code}: Does the option of creating a lucky number give customers for Livestream dialing?
> How to use the Dial feature: https://fchat.co/help/quay-so.
- Notify - notification of guests who have just registered: Notify shows someone who just signed up. You can customize Notify On/Off and set the time between notifications.
- Countdown Timer: Displaying a countdown timer helps to hit the psychology of users so that they quickly provide information, increasing the percentage of visitors filling in forms. You can customize the webform countdown time.
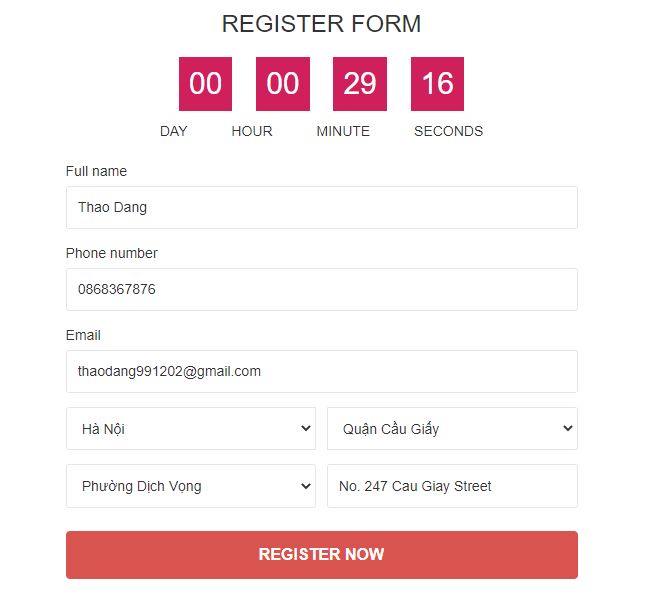
The webform displayed on the customer's screen is shown as the image below:
You can send a webform link to the registered guest or Get the webform embed code placed on the website or landing page. Customers who register will be directed to the chatbot script and receive a message below the webform:
