Set up customer management tag
Tags are labels that categorize customers as “customers who have purchased products”, “customers are interested” or “customers have not left phone numbers”…
During the page configuration process, set up tags to categorize customers and submit Customer care content tailored to each customer group.
1. Create customer tags
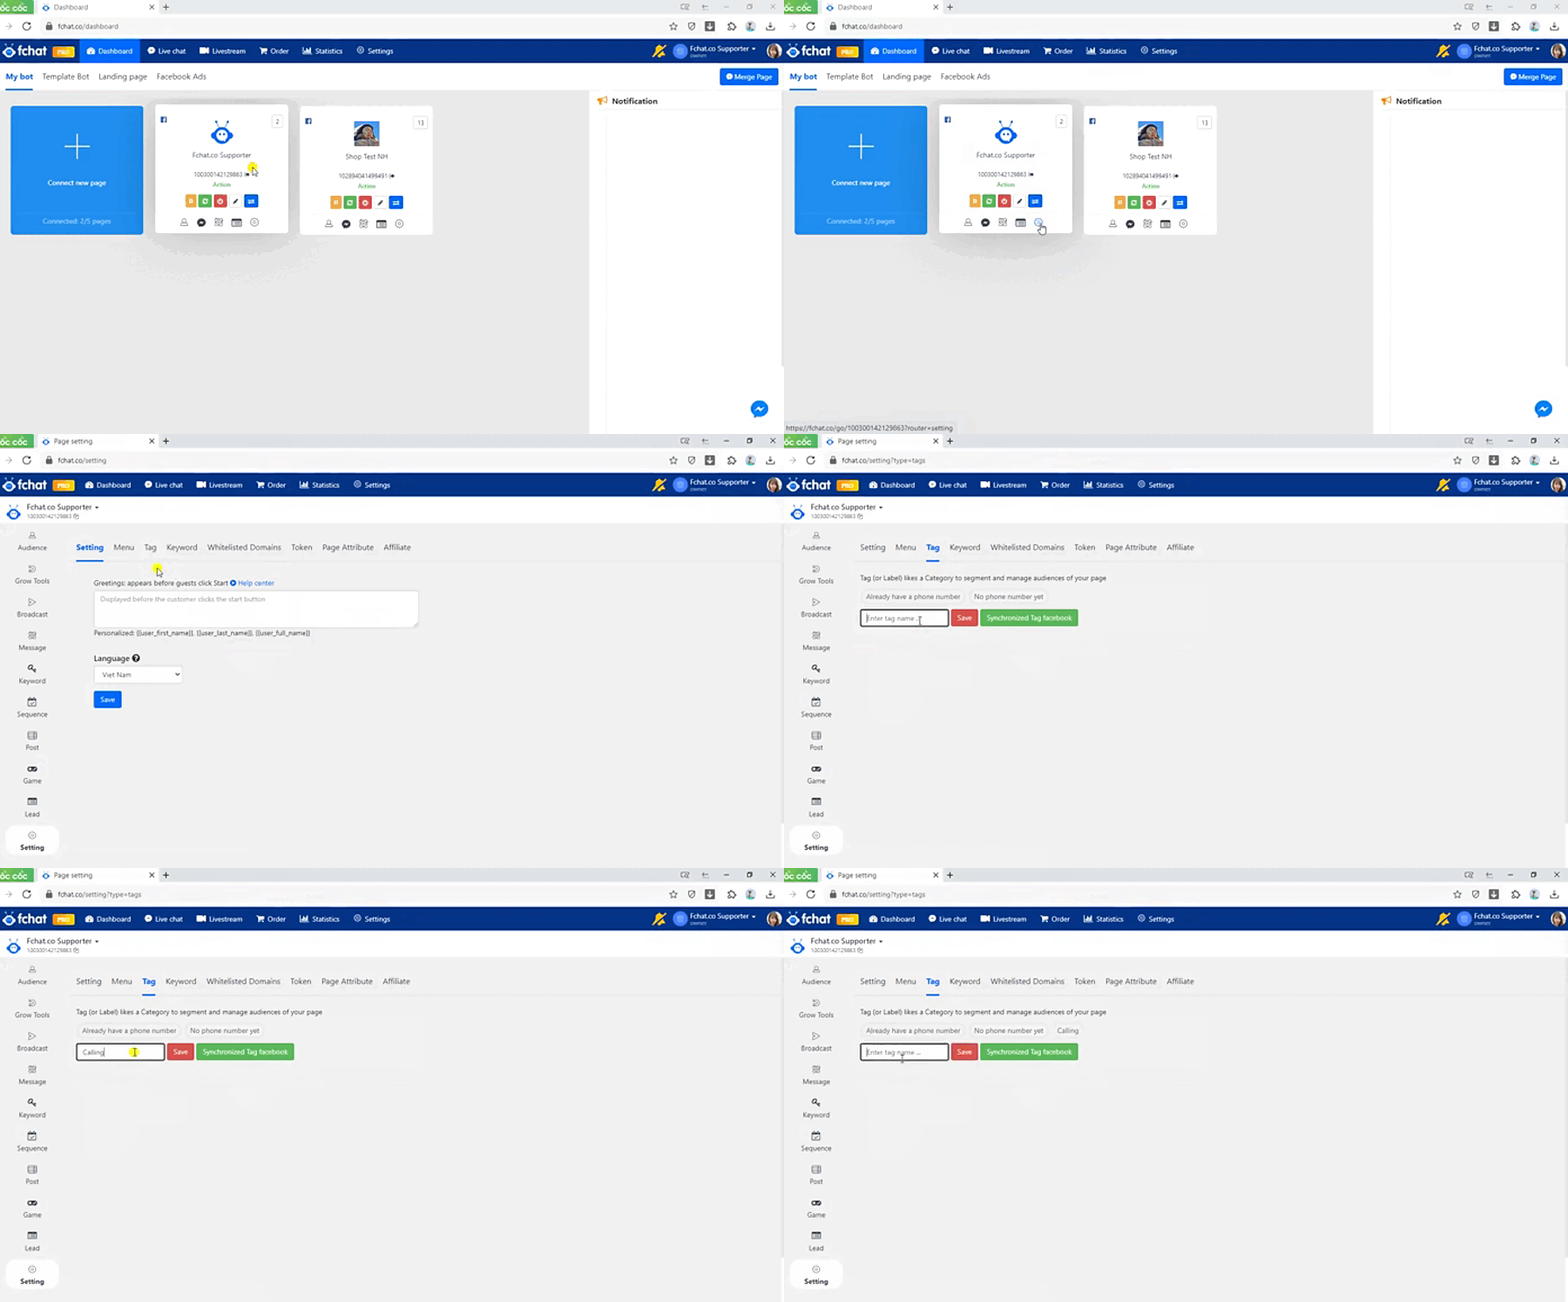
To create tags that categorize customers, click on the Page to set up customer tags, and in the menu item along the left side of the screen, click Page setting >> Tag customers and add the tag you want.
For example, add tags such as “Purchased”, “Calling”, “Called”, "Processing", "Paid", . . .

2. Tag customers
There are 3 methods to tag customers:
Method 1: Manually tag each customer
Manually tag each customer at Live chat or the Customer section.
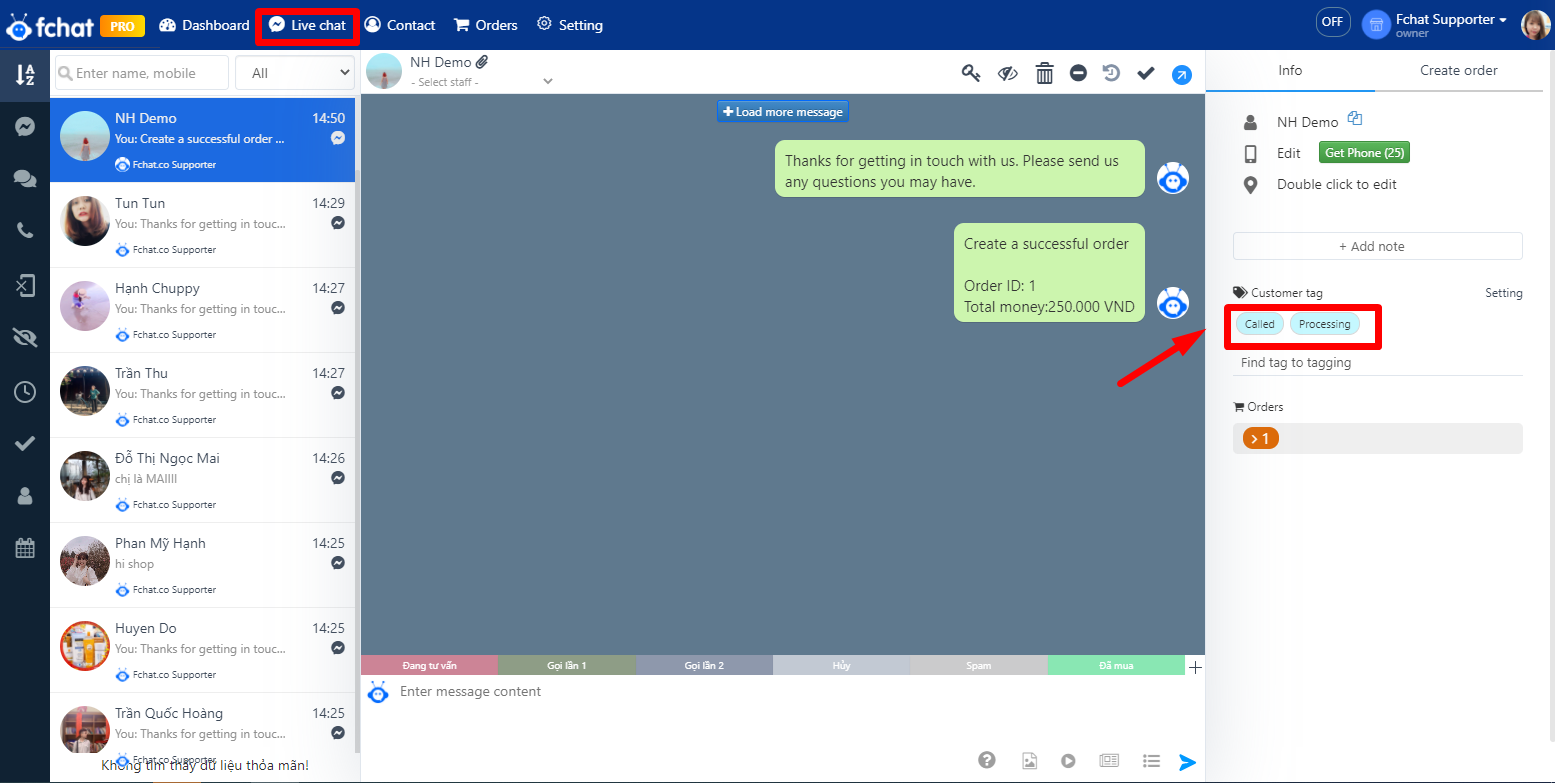
- In the Livechat window: Choose a conversation with a specific customer > you click on the tag in the column to the right of the conversation (the tag shows blue that you have successfully tagged)
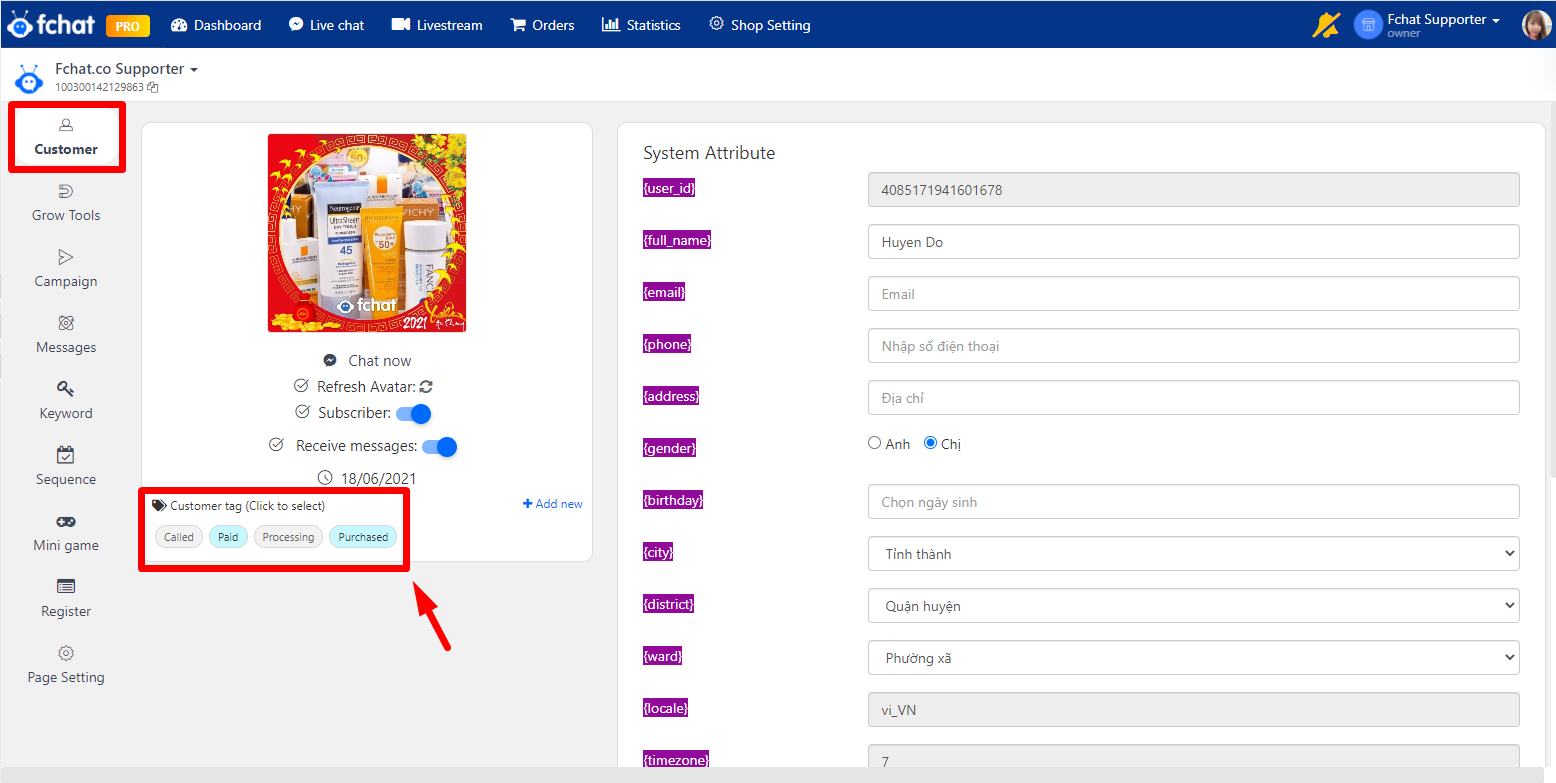
- At the Customer section: Select a specific customer >> Edit >> you click Tag (the tag shows blue that you have successfully tagged).
Method 2: Automatically tag each customer
Use the "Tagging" when creating an automated message script in Block.
Here, optionally Tagging/Un-tagging.
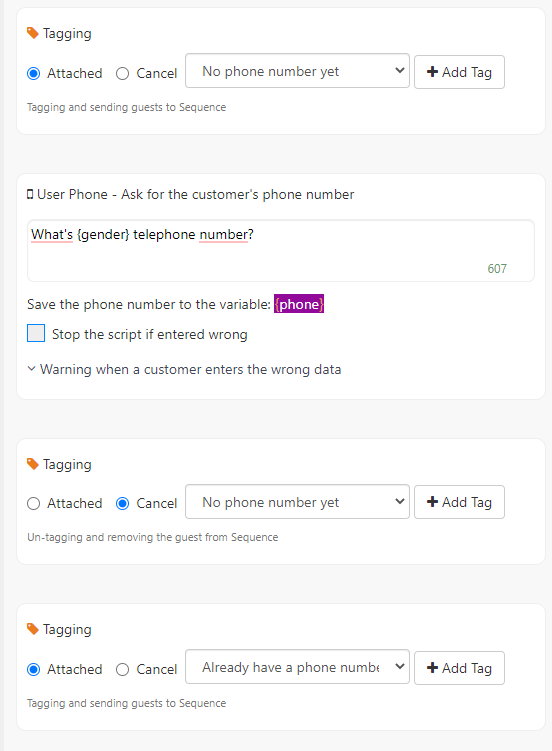
Like the above scenario, customers have defaulted to tag “No phone number yet” when running through Block, and when the customer has filled in the phone number, the tag “No phone number yet” will be canceled and attached to the tag “Already have a phone number”.
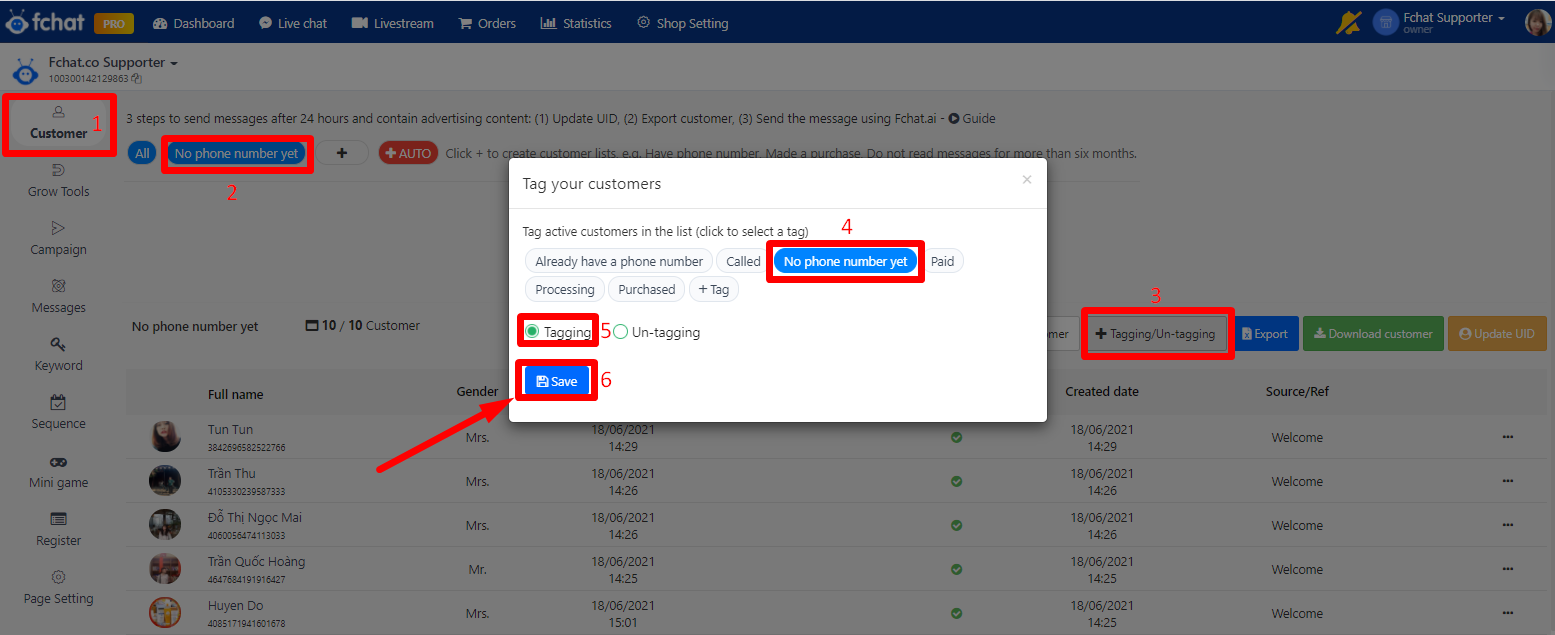
Method 3: Simultaneously tag customers
On the customer list page: you filter the list of customers who want to attach tags in bulk, then click the "Tagging/Un-tagging" button.
For example: Filter the list of all customers who don't have a phone number, and attach a bulk tag "No phone number yet".
Wishing you success!